
Planting onions from bulbs you already have is one of the most satisfying tricks in a gardener’s book, and it’s a method that works exceptionally well in Nigeria. It’s like giving your crop a running start, leading to quicker growth and a more reliable harvest. The best part? You’re essentially turning one onion from your kitchen into a continuous supply, right from your own backyard or farm.
Why Growing Onions From Onions Is a Smart Choice
Opting to grow onions from other onions isn’t just a handy shortcut; it’s a solid strategy for getting better, faster results. Seeds can be fussy, requiring a long time to sprout and constant attention. But when you plant a bulb set—which is just a small onion—you give your new plant a massive head start.
This method is particularly brilliant for navigating Nigeria’s diverse climates. An established bulb is tougher and more resistant to unpredictable weather, allowing it to put down roots and send up shoots in no time. This means you get a quicker harvest of both green spring onions and, eventually, full-sized bulbs.
The Economic and Sustainable Edge
Beyond just speed, this technique is great for your wallet. When you save your best bulbs from one harvest to plant for the next, you create a self-sustaining cycle. This cuts down on the need to buy new seeds or sets every single season. This isn’t just about saving cash; it’s about building local food security.
Nigeria’s onion production has been on the rise, and a big reason for that is farmers replanting their own bulb sets. In 2022, local farms produced around 1.8 million tons of dry onions, partly because more land was being used for cultivation. This shows just how effective propagating from existing bulbs can be when you want to scale up.
Practical Example: A small-scale farmer in Kano can reserve 10% of their best-harvested onions, cure them properly, and use them as the planting stock for the next season. This eliminates the annual cost and risk of sourcing new, potentially unreliable bulbs, turning a harvest byproduct into a valuable asset.
If you’re serious about creating a garden that feeds you, understanding these kinds of propagation techniques is key. For a broader look at cultivating a successful vegetable patch, this guide on achieving vegetable gardening success provides fantastic foundational knowledge that pairs perfectly with what we’re talking about here.
Growing From Onions vs Growing From Seeds
This table lays out the key differences at a glance:
| Attribute | Growing From Onions (Bulb Sets) | Growing From Seeds |
|---|---|---|
| Time to Harvest | Much faster (usually within 90-120 days) | Significantly longer (150-180 days or more) |
| Effort & Skill | Beginner-friendly, less fuss | Requires more attention, especially during germination |
| Success Rate | Very high; bulbs are already established | Lower; seeds can fail to germinate or seedlings can die |
| Cost | Can be free if using your own onions, or cheap to buy sets | Seeds are initially cheaper, but you might lose some |
| Variety | Limited to the varieties available as sets | A much wider range of varieties available |
As you can see, while seeds offer more variety, starting from bulbs gives you a much more reliable and faster path to a successful harvest. It’s a trade-off that, for most people, is well worth it.
Picking the Right Onion Bulbs for Planting
Your success with growing onions from onions starts way before you get your hands dirty. It all comes down to choosing the right ‘mother bulb’. This isn’t just about grabbing any old onion from your kitchen; it’s about finding one that’s ready and eager to grow.
A good onion for planting should feel firm and solid, with dry, papery skin. Steer clear of any bulbs that have soft spots, a hint of mould, or any nicks and bruises. Those are all red flags for rot or disease, which will stop a new plant in its tracks. A healthy bulb gives you a strong start.
What Makes a Good Onion Bulb for Planting?
The best sign to look for is a little green sprout already peeking out from the top. That tiny shoot is your proof that the onion is no longer dormant and is actively trying to grow. This is exactly what you want.
Numbered Steps for Selection:
- Inspect Visually: Look for a bulb with intact, papery skin. Avoid any with dark, mouldy patches or visible bruises.
- Perform a Squeeze Test: Gently squeeze the onion. It should feel solid all around, with no mushy or soft spots.
- Check for Sprouts: Prioritize any onion that has a small green shoot emerging from the top. This is the clearest sign it’s ready to plant.
- Sniff Test: A healthy onion should smell like an onion. Any sour or rotten smell means it’s already decaying and should not be planted.
Practical Example: Imagine you have two onions on your counter. One is perfectly round and firm, but it’s just sitting there. The other is a bit smaller, but it has a centimetre-long green shoot sticking out of its neck. Choose the sprouting one every single time. It’s already shown you it wants to grow, which can save you weeks of waiting and wondering if anything is happening underground.
Where to Get Your Bulbs and What to Avoid
You can find your planting bulbs in a few places: your own kitchen pantry, leftover onions from a previous harvest, or a local farmers’ market. Buying from a market is a great option because you can often chat with the vendor and find bulbs that you know haven’t been treated with sprout inhibitors—something large supermarkets often do to extend shelf life.
Sadly, finding good quality planting material is a major headache for many gardeners and farmers in Nigeria. There’s a widespread crisis with counterfeit seeds and bulbs that has led to heartbreaking crop failures. In some northern states, farmers have lost huge amounts of money to fake onion bulbs, with losses in Jigawa alone estimated to be over ₦1 billion. This not only hurts the farmers but also affects our food supply. You can read more about the counterfeit seed crisis Nigerian farmers are up against on Business AM Live.
Being careful about where you get your bulbs is absolutely critical. If you’re buying, stick with a seller you know and trust. If you’re using your own, you have the huge advantage of knowing exactly what you’re planting.
Actionable Takeaways
- Prioritize Sprouts: Always choose an onion that has already started sprouting.
- Do a Health Check: Pass on any onion with soft spots, mould, or damage.
- Source Smart: Use onions from your own kitchen or a trusted local market to avoid sprout-inhibited bulbs.
- Final Inspection: Give your chosen bulb one last look-over for any signs of decay right before you plant it.
Getting Your Onion Bulbs in the Ground
Alright, you’ve picked out your best bulbs, and now it’s time for the real magic. Getting your onions planted correctly is where you lay the foundation for a fantastic harvest. A little bit of care at this stage goes a long way.
First things first, let’s talk about soil. Onions aren’t terribly picky, but they thrive in soil that’s loose, full of nutrients, and drains well. If there’s one thing an onion bulb hates, it’s sitting in soggy, compacted soil—that’s a fast track to bulb rot.
To give your onions the best start, work a good amount of well-rotted compost or some aged manure into the top 15-20 centimetres of the garden bed. This does two things: it feeds the plants and it lightens up the soil, making it easier for new roots to stretch out. If you’re using pots or sacks, a quality potting mix with a bit of compost mixed in is perfect.
Step-by-Step Planting Instructions
Step 1: Prepare the Bulb
- For small bulbs (like shallots): Plant the whole thing. It has all the energy it needs to get going.
- For larger onions: To multiply your plants, take a clean, sharp knife and carefully cut a larger onion into quarters. The key is to make sure each piece has a bit of the flat, rooty base attached. That’s where the new roots will sprout from.
Step 2: Cure the Cuts
Once you’ve cut your pieces, let them sit out in a dry, airy spot for a day or so. This lets the cut surfaces dry out and form a “scab,” which seriously lowers the chances of them rotting in the damp soil.
The infographic below is a handy visual reminder of what you’re looking for when selecting your bulbs in the first place.
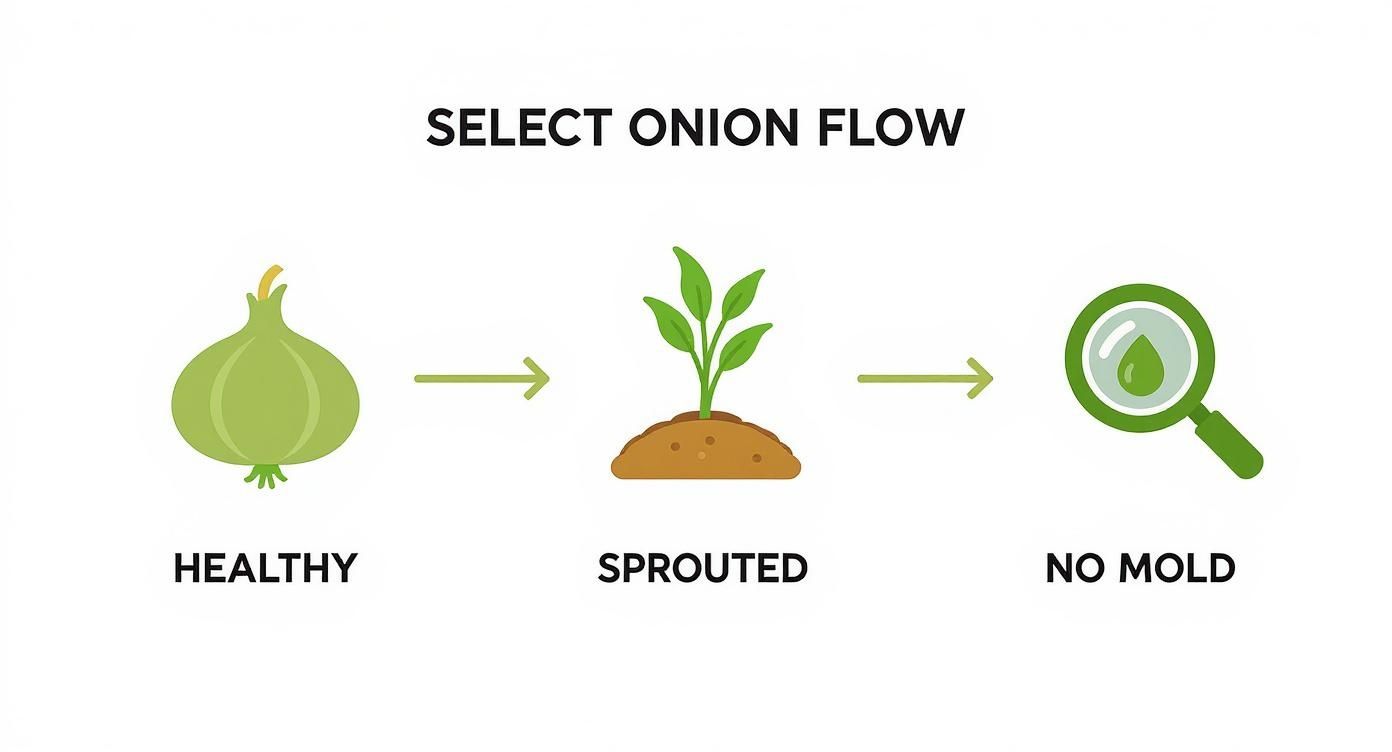
alt text: An infographic showing the three steps to select a healthy onion for planting: checking for a firm, healthy bulb; looking for a green sprout; and ensuring there is no mold or soft spots.
Step 3: Plant at the Correct Depth and Spacing
Dig a small trench or individual holes about 5 centimetres (2 inches) deep. Place your onion bulb or section into the hole with the pointy, sprouting end facing up towards the sky. The flat, rooty part goes down. Gently push the soil back around it and pat it down so it’s snug. For spacing, give them about 10-15 centimetres (4-6 inches) of personal space on all sides.
Practical Example: If you’re planting in a large grow bag, you can probably fit four or five onion sections inside. Space them out evenly, about 10 cm from each other and from the sides of the bag. This makes the most of your space while keeping the plants happy.
Step 4: Water Thoroughly
Once they’re all in, give them a good, gentle watering. This helps settle the soil around the bulbs and signals the roots that it’s time to start growing. And just like that, you’re on your way to a fresh onion harvest.
Beyond just the physical planting, nailing the perfect timing for planting onions can make a huge difference. Getting them in the ground at the right time of year gives the bulbs a chance to establish themselves before the weather gets too extreme.
Actionable Takeaways
- Feed Your Soil: Always mix in some compost or aged manure before planting.
- Cut and Cure Larger Onions: Divide big onions into sections, making sure each has a root base, and let the cuts dry for a day.
- Pointy Side Up: Plant your onions with any green sprouts pointing up.
- Don’t Crowd Them: Leave at least 10-15 cm between each bulb for proper growth.
- Give a First Drink: Water them in well right after planting to settle the soil.
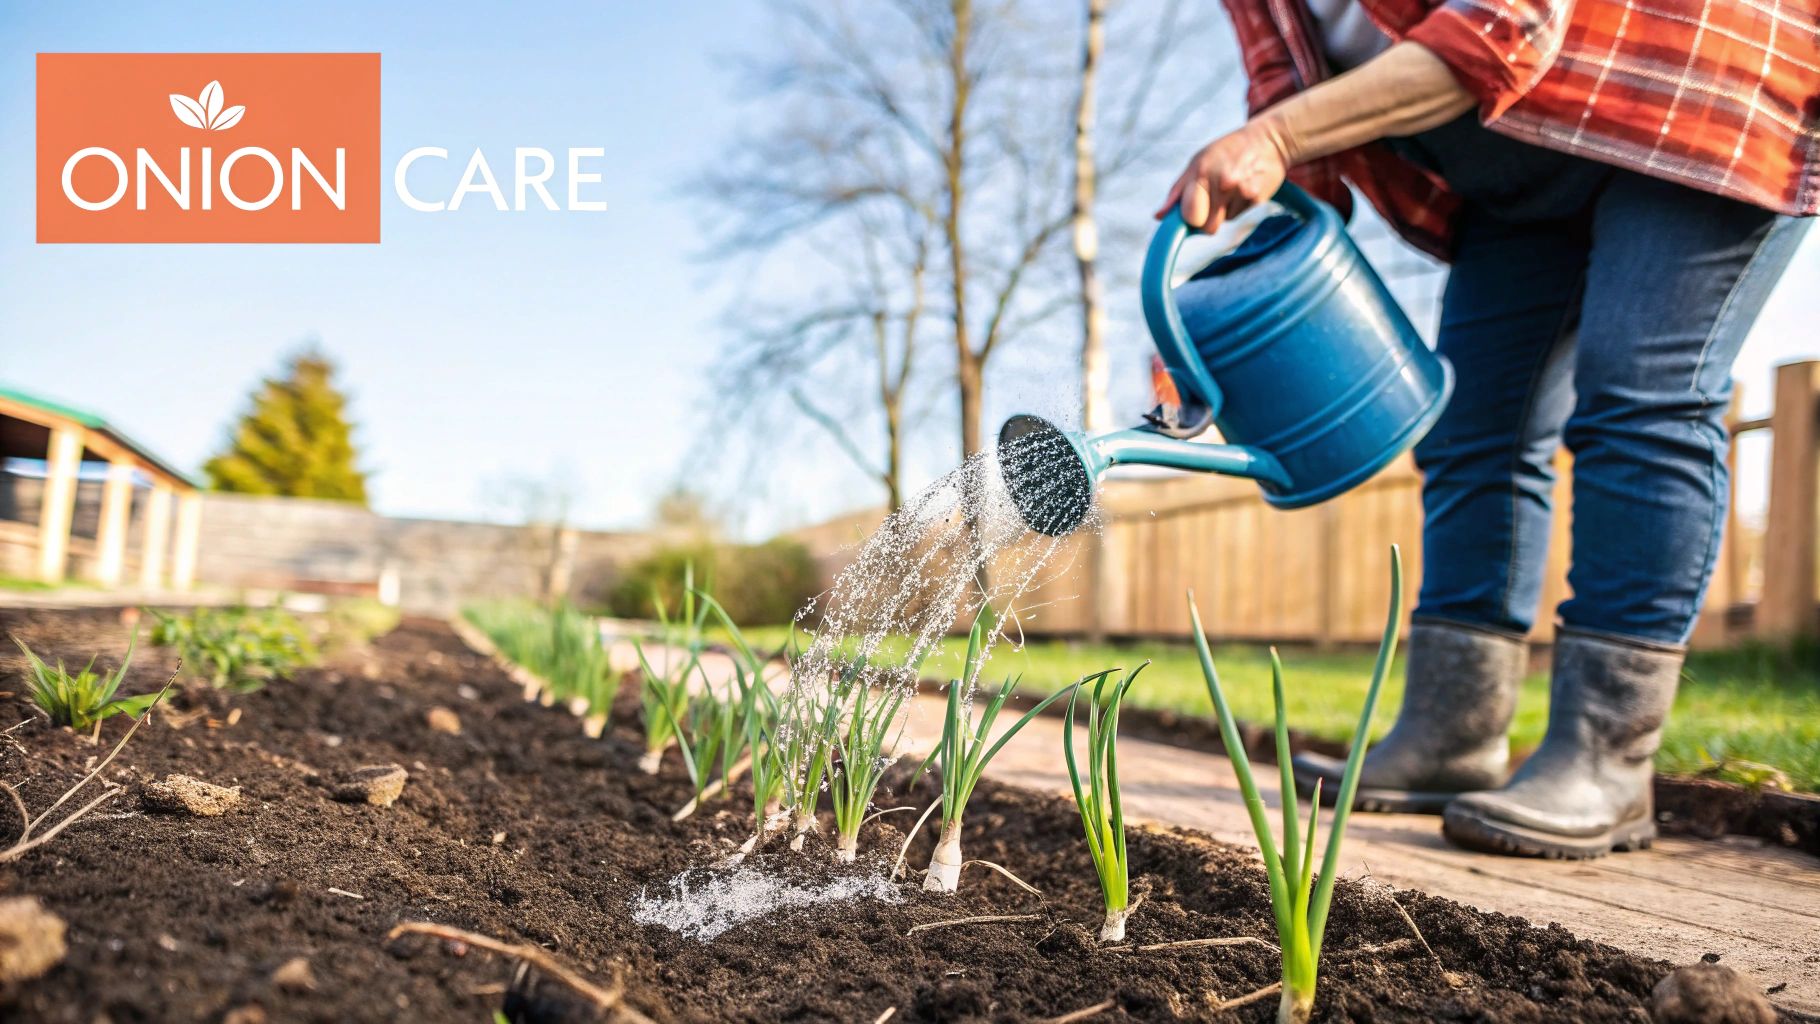
Tending to Your Growing Onions
Once your onions are tucked into the soil, the real fun begins. Getting from a tiny sprout to a full-sized onion is all about consistent care. The good news is that onions are tough plants, and looking after them boils down to a few straightforward routines well-suited to the Nigerian climate.
alt text: Two hands gently tending to young green onion shoots emerging from rich, dark garden soil, illustrating the care needed for growing onions.
If there’s one secret to great onions, it’s getting the watering just right. Onions have shallow roots, so they need a steady supply of water near the surface. But—and this is a big but—they absolutely hate having “wet feet.” Soggy, waterlogged soil is a fast track to bulb rot.
Your goal is to keep the soil consistently damp, never soaking wet. During dry spells, a deep watering once or twice a week is usually enough. Let the top inch of soil dry out between sessions. When the rains come, nature might handle the job for you, but always stick your finger in the soil to check before you add more water.
Feeding Your Onions for Big, Healthy Bulbs
Onions are hungry plants. They need plenty of nutrients, especially nitrogen, to grow lush green tops. Here’s a tip: the size of the bulb you harvest is directly linked to how big and healthy the leaves get. Feeding them at the right time is critical.
How to Make and Use Compost Tea (Step-by-Step):
- Fill: Get a bucket and fill it one-third of the way with finished compost.
- Soak: Top it up with water and let it steep for 24-48 hours, stirring occasionally.
- Strain: Pour the liquid through a cloth or strainer to remove the solids.
- Dilute: Dilute the strained liquid with water until it looks like weak tea.
- Apply: Use this liquid fertiliser to water your onions every two to three weeks while the tops are actively growing. This boost encourages vigorous leaf growth, which feeds the developing bulb.
Important: Once you see the bulbs starting to swell and push up from the soil, stop feeding.
A classic mistake is feeding your onions for too long. If you keep giving them nitrogen late in the season, they’ll focus on growing more leaves instead of putting that energy into the bulb. This can delay harvesting and lead to onions that don’t store well.
Weeding and Watching for Trouble
Weeds are your onions’ worst enemy; they steal water, sunlight, and nutrients. Since onion roots are shallow, you must be careful when weeding. Pulling weeds aggressively can easily disturb your crop. The best approach is to get them by hand when they’re small and the soil is damp, which makes them come out easier.
Keep a close eye on your plants. If the tips of the onion leaves start turning yellow, it’s often a sign of too much water or not enough nitrogen. First, let the soil dry out. If the yellowing continues, a dose of your compost tea should sort it out.
Actionable Takeaways
- Water Smart: Aim for damp, not soggy. Check soil moisture with your finger before watering.
- Feed for Growth: Use compost tea every 2-3 weeks to encourage strong green tops.
- Know When to Stop: Cut off all fertiliser as soon as the bulbs begin to visibly swell.
- Weed Gently: Hand-pull weeds often, being careful not to disturb the shallow onion roots.
- Diagnose Yellow Tips: Yellowing leaves usually mean overwatering or lack of nitrogen. Adjust your care plan accordingly.
Harvesting and Storing Your Homegrown Onions
After weeks of patient care, you’ve reached the best part. Knowing when and how to harvest your onions is just as crucial as how you planted them. Get this stage right, and you’ll be enjoying your own onions for months.
The plant itself tells you when it’s time. You’ll see the green tops start to yellow and weaken at the “neck,” causing them to flop over. That’s the signal that the bulb has stopped growing and is ready to come out of the ground. Always try to harvest on a dry day; pulling onions from wet soil invites rot.

alt text: A bunch of freshly harvested onions with green tops and muddy roots lying on a wooden table, in the process of being cured for storage.
Harvesting and Curing in 4 Steps
Step 1: Harvest Gently
Don’t just yank them out. Loosen the soil around the bulb with a small hand trowel. This prevents bruising as you lift the onion from the earth. Carefully pull the onion up by the base of its leaves. Shake off any loose dirt, but don’t wash them.
Step 2: Start the Curing Process
Curing is non-negotiable if you want your onions to last. It’s the process of drying the onion’s outer layers to create a tough, protective skin. You’ll need a warm, dry, and well-ventilated spot—a covered porch, a dry shed, or under a carport works perfectly.
Step 3: Arrange for Airflow
Spread the onions out in a single layer. Don’t pile them up. Using a rack or an old screen is ideal because it lets air circulate all around them. Leave them to cure for about two to three weeks.
Step 4: Check for Readiness
You’ll know they’re ready when the outer skins become papery and dry, the necks feel tight and withered, and the roots have completely shrivelled up.
Practical Example: Lay your onions on an old window screen propped up on bricks inside a shed. This keeps them off the damp floor and gets excellent airflow underneath. Check them every few days. After about 18 days, the necks should be completely dry with no hint of moisture when squeezed—that’s the green light for storage.
Traditional Nigerian Storage Methods That Work
Once they’re perfectly cured, it’s time to put them away. In Nigeria, proper storage is a huge challenge. Post-harvest losses can hit over 30% from spoilage alone, a major issue you can read about in this RMRDC report. Thankfully, some time-tested home techniques are highly effective.
One of the best methods is to braid the dry tops together into a rope of onions and hang it in a cool, dry place. This keeps them separated and guarantees fantastic air circulation. Storing them in mesh bags or well-ventilated crates also works well. The golden rules of onion storage are: keep them cool, dry, dark, and with plenty of air.
Onion Storage Troubleshooting Guide
| Problem | Cause | Solution |
|---|---|---|
| Sprouting | Too much light or humidity; stored for too long. | Move onions to a darker, cooler, and drier location. Use sprouted onions first, as they are still edible. |
| Soft Spots or Mould | Poor air circulation, high humidity, or bruising during harvest. | Discard any mouldy onions immediately to prevent spread. Ensure storage area is well-ventilated. Next time, cure them for longer. |
| Black Powdery Mould | A common fungus (Aspergillus niger) that thrives in warm, humid conditions. | Improve air circulation. You can wipe off small spots and use the onion, but discard any heavily affected bulbs. |
| Unpleasant Smell | Bacterial rot, often from moisture trapped in the neck. | This is a sign of decay. Find and discard the rotting onion immediately before it affects others. |
By keeping these simple tips in mind, you can drastically reduce spoilage and enjoy your harvest for much longer.
Common Questions About Growing Onions From Onions
Even with a solid plan, a few questions always pop up. Growing onions from other onions is pretty simple, but let’s walk through some common sticking points.
How Many Onions Do You Get From Planting One Onion?
When you plant one “mother” onion bulb, you will generally get one new, full-sized onion. However, while that new bulb is forming, the plant sends up plenty of green shoots that you can snip and use like spring onions.
To multiply your harvest, take a larger mother onion and carefully slice it into quarters from top to bottom, ensuring each piece has a bit of the root base attached. Plant these individual sections, and each one can grow into its own onion plant.
Can I Use Any Onion From the Grocery Store?
You can, but you need to be selective. The best ones are those already showing a tiny green sprout. Always look for firm, healthy bulbs and avoid any that are soft, mouldy, or bruised. Be aware that some commercially grown onions are treated with a sprout inhibitor to extend their shelf life; these will not grow. You’ll often have better luck with onions from a local farmers’ market.
Why Are My Planted Onion Leaves Turning Yellow?
Yellowing leaves usually point to one of a few things, most often overwatering. Soggy soil leads to root rot, so ensure your pot or garden bed has excellent drainage. A lack of nitrogen can also cause yellowing; a quick fix is a dose of compost tea.
However, if the onion tops start to yellow and flop over after a few months, don’t worry! That’s the plant’s natural way of telling you the bulb is mature and ready to be harvested.
How Long Does It Take to Harvest?
Growing from a bulb is much quicker than starting from seed. You can start snipping the green tops to use as spring onions in as little as 2-3 weeks. For a full-sized onion bulb to develop, it typically takes around 90 to 120 days. The exact timing depends on the onion variety, soil quality, and local weather. Your plant will give you the final signal when its tops turn yellow and fall over.
Tools and Resources
- Soil Testing: A simple home soil test kit can help you check pH and nutrient levels before planting.
- Composting Guide: For making your own nutrient-rich compost, see this guide from the Farmer’s Almanac on composting.
- Gardening Planner: Use a simple calendar or a gardening app to track planting dates, feeding schedules, and harvest times.
Further Reading
- Business opportunities in Nigeria – Explore how small-scale farming can become a viable business.
- Achieving vegetable gardening success – A great resource for general vegetable gardening tips.
- Business AM Live on the Nigerian Onion Market – Understand the broader challenges facing onion farmers.
Ready to create compelling content, generate stunning visuals, or build powerful chatbots effortlessly? RichlyAI provides a complete suite of AI tools to help you innovate and save time. Start exploring for free and see what you can create at RichlyAI Hub.