
At its heart, a photo text editor is a wonderfully straightforward tool that lets you layer words, phrases, and stylish text directly onto your pictures. Think of it as your digital pen, turning a simple image into a powerful message.
Understanding The Power Of Adding Text To Photos
An image on its own makes a statement. But when you add text, that statement becomes a full-blown conversation. A photo text editor is what bridges your visual ideas with clear, direct words, making your images do more of the heavy lifting.
For a practical example, imagine a travel blogger posts a stunning photo of a beach. It’s beautiful, but it’s passive. Now, using a photo text editor, they add the text: “Hidden Gem: This beach in Bali is only a 15-minute hike from the main road!” Instantly, the image transforms from just a pretty picture into actionable, valuable content for their audience. This ability to add layers of meaning is precisely what makes these editors so essential.
Turning Visuals Into Communication
A photo text editor is all about giving your images context, personality, and a clear purpose. It’s not simply about writing on a picture; it’s about steering how your audience sees and understands it. You can point their attention to a specific detail, spark an emotion, or share crucial information the photo alone can’t.
This is especially true in places with a booming digital scene. The photo editing market in Nigeria, for instance, is growing incredibly fast, thanks to widespread smartphone use and internet access. With over 108 million internet users in 2023, there’s a massive appetite for user-friendly creative tools, especially among young people who drive trends on platforms like Instagram and TikTok.
Adding text changes a passive image into an active piece of communication. It’s the difference between showing someone a photo of a landmark and giving them a guided tour packed with fascinating stories.
Why Every Creator Needs This Skill
Whether you’re a small business owner in Lagos, a blogger sharing your passions, or a social media manager crafting campaigns, knowing how to add text to photos is a game-changing skill. Here’s a look at the actionable benefits:
- Boost Engagement: Create visuals that stop the endless scroll. For example, an image with a question like, “What’s your favorite coffee spot?” encourages comments and interaction.
- Strengthen Branding: Consistently use your brand’s fonts, colours, and messaging. Actionable insight: Create a simple style guide with your brand’s primary font (e.g., Poppins Bold) and hex color code (e.g., #4A90E2) to apply to every image.
- Communicate Clearly: Design promotional graphics, event invites, or quick announcements. Example: A restaurant can post a photo of a dish with the text “New Menu Item: Spicy Chicken Tacos! Available starting tonight.”
- Tell Better Stories: Pair striking images with quotes, captions, or narratives to create more memorable and impactful content.
Getting comfortable with a photo text editor isn’t just about making things look good; it’s about making your message resonate. For a deeper dive into modern creative tools, see our post on RichlyAI’s perfect content and image generator.
What Makes a Great Photo Text Editor?

Finding the right photo text editor is like choosing the perfect set of brushes for a painting. Sure, almost any tool can splash some words onto a picture, but the best ones give you the fine-tuned control needed to create something truly special. It’s these features that separate a basic app from a powerful creative partner.
A good editor doesn’t just let you type on an image; it helps you weave your message into the visual itself. Let’s break down the essential features that turn an ordinary photo into a professional-looking graphic.
Font Library and Customisation Options
Typography is the heart of your message. A top-notch photo text editor should come loaded with a diverse font library, offering everything from clean, modern sans-serifs to classic, elegant scripts. This variety is key to matching the text’s personality to the image’s vibe.
But a big library is only the beginning. True creative freedom comes from customisation. For any business, the ability to upload your own brand fonts is non-negotiable for maintaining consistency. For example, if your brand guidelines specify “Montserrat” for all marketing materials, your editor needs to support it.
Beyond font choice, look for these granular controls:
- Spacing Controls: Adjusting the space between letters (kerning) and lines (leading) is crucial for readability and a polished, professional finish. Practical use: Increase line spacing on multi-line text to make it feel more open and easier to read.
- Colour and Opacity: A full-spectrum colour picker is a must, as is the ability to adjust transparency for creating subtle watermarks or layered designs.
- Alignment and Sizing: These fundamental tools are essential for positioning your text perfectly within the photo’s composition.
Advanced Styling and Effects
To make your text truly stand out, especially against a busy background, you need more than just a pretty font. Advanced styling effects are what add that polished, three-dimensional quality that grabs attention and ensures your words are easy to read.
A great photo text editor doesn’t just add words; it integrates them seamlessly, making them feel like a natural part of the image.
Look for styling features that give your text some punch:
- Shadows and Outlines: A simple drop shadow or a crisp outline can instantly lift text off the background, adding depth and making it pop. Actionable tip: Use a soft, dark drop shadow on light text placed over a bright, complex background to improve legibility instantly.
- Text Curving: The ability to wrap text in an arch or a full circle is fantastic for creating logos, emblems, or unique designs that follow the natural lines of your image.
- Texture Overlays: Applying a texture—like brushed metal or wood grain—can give your text a unique, tactile quality that makes your design more interesting.
Essential Features of a Modern Photo Text Editor
To bring it all together, a truly effective photo text editor needs to be a well-rounded tool. The table below breaks down the must-have features that empower you to create high-quality, professional visuals.
| Feature Category | Key Functionalities | Why It Matters |
|---|---|---|
| Typography & Fonts | Extensive font library, custom font uploads, bold/italic styles. | Gives you the flexibility to match text to any brand or mood, ensuring brand consistency and creative freedom. |
| Text Customisation | Colour picker, opacity control, precise sizing, alignment tools. | Provides complete control over the text’s appearance, ensuring it is legible and perfectly positioned. |
| Spacing Control | Kerning (letter spacing) and leading (line spacing) adjustments. | Prevents text from looking cramped or unprofessional, dramatically improving readability and aesthetics. |
| Advanced Styling | Drop shadows, outlines, glow effects, text curving/warping. | Adds depth and dimension, helping text stand out from the background and creating more dynamic visuals. |
| Layer Management | Ability to manage text and image elements in separate layers. | Allows for complex compositions and makes it easy to edit individual elements without affecting others. |
| Ease of Use | Intuitive user interface, simple drag-and-drop functionality. | A smooth workflow lets you focus on creativity instead of wrestling with complicated tools. |
Ultimately, having these features at your fingertips means you can move beyond simple text overlays and start creating truly integrated, compelling designs.
Mastering these tools allows you to elevate a simple image into a powerful piece of communication. To build out your creative arsenal even further, you can explore other essential tools for content creators that complement a high-quality photo text editor.
A Step-by-Step Guide to Adding Text to Photos
Turning a simple picture into something that really communicates a message is easier than you might think. All it takes is a good photo text editor and a clear process. Let’s walk through the practical steps, from picking the perfect image to making those final tweaks.
Step 1: Choose Your Image Strategically
Everything starts with the right photograph. Before you even think about adding words, find a high-quality image with a clear subject. Look for what designers call “negative space”—those quieter, less busy areas in the picture, like a clear sky or a plain wall. This is the ideal spot for your text.
Actionable Insight: If your photo is busy all over, you can create negative space. Add a semi-transparent shape (like a darkened rectangle) behind where your text will go. This instantly creates a readable area without completely hiding the background.
Step 2: Add and Format Your Text for Clarity
Got your image? Great. Now it’s time to add your words. Open your photo text editor, select the text tool, and type your message.
Now, let’s make it look great:
- Select a Font: Choose a font that reflects the message’s tone. A playful script might feel creative and fun, whereas a bold, clean sans-serif font comes across as modern and direct. Practical Tip: Avoid using more than two fonts to prevent a cluttered look.
- Choose Size and Colour: Your text must be readable. Drag the corners of the text box to resize it. For the colour, pick one that contrasts strongly with the background. Actionable Trick: Use the built-in eyedropper tool to select a colour directly from the photo. This creates a professional, cohesive design. For instance, if your photo has a bright blue flower, using that same blue for your text headline can tie the whole image together.
Think of your text as part of the photo’s composition, not just something stuck on top. The goal is to make the words and the image tell a single, powerful story together.
This infographic breaks down the whole process into three simple stages.
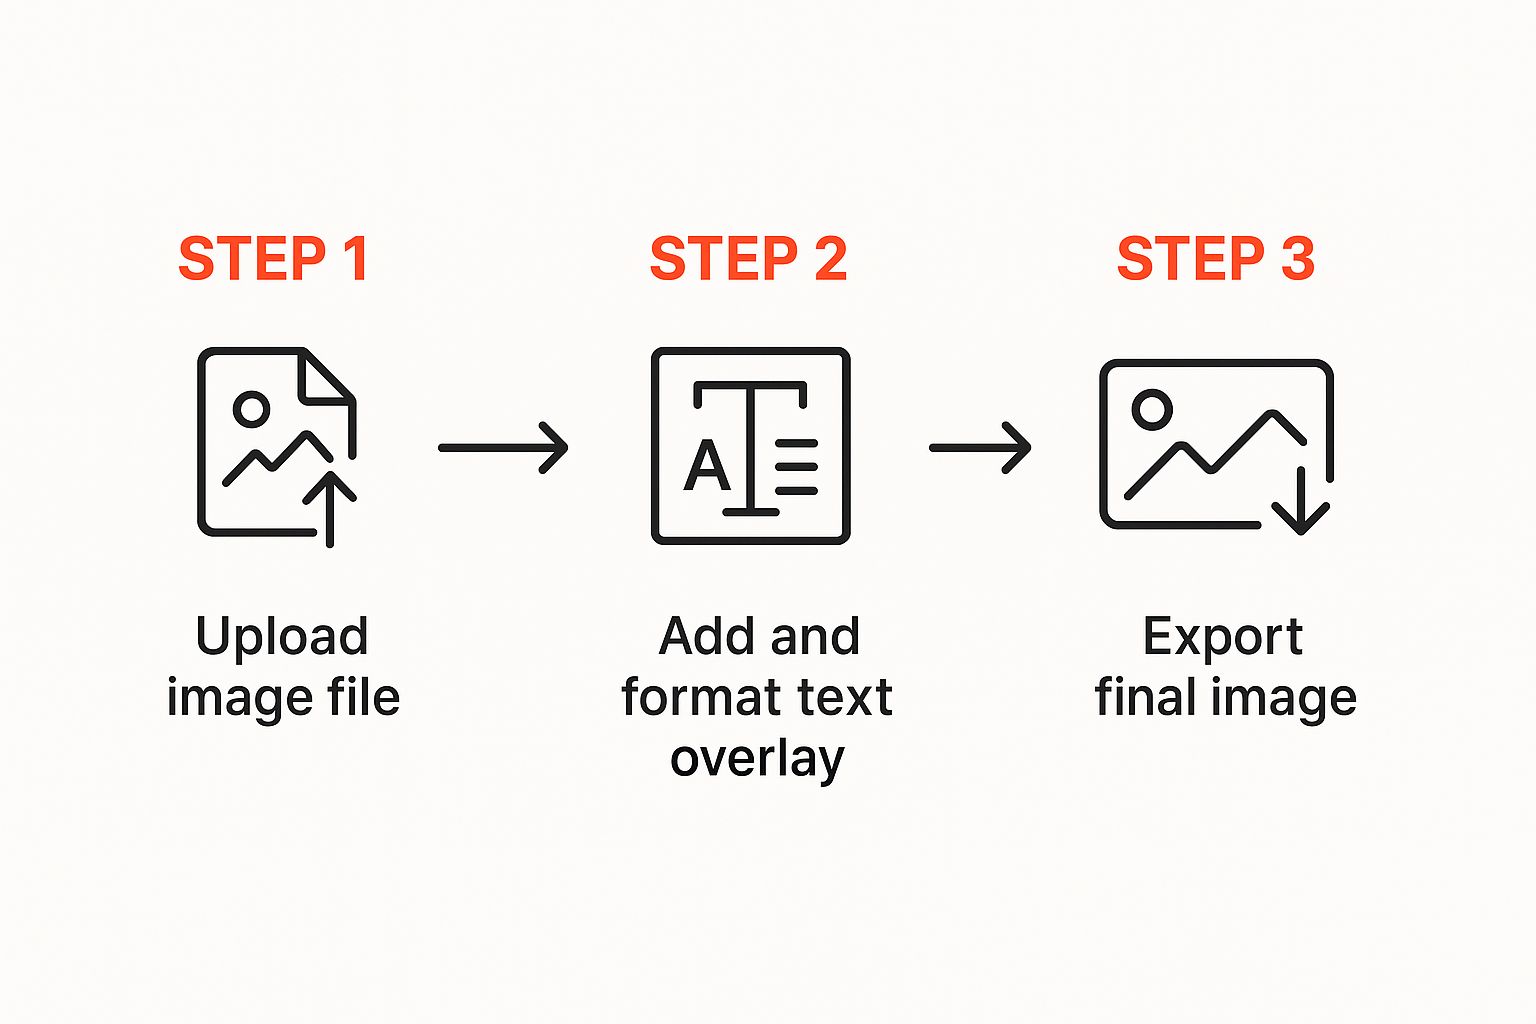
As you can see, it’s a straightforward flow: upload, format, and then export your finished design.
Step 3: Position and Refine for Maximum Impact
This final step is all about placement and polish. Use the alignment tools in your editor to position the text. A good guideline is the rule of thirds: imagine your image is divided by a 3×3 grid. Placing your text along one of these lines or at an intersection often creates a more balanced and visually appealing design.
To really make your text readable, especially on a busy background, add a finishing touch:
- Add a Drop Shadow: Go to the text effects panel and select “Shadow.” Set the opacity to around 40-50% and the blur to 5-10 pixels for a subtle lift.
- Apply an Outline: If the background has varied colors, a thin outline (or “stroke”) in a contrasting color (like white or black) can make the letters stand out clearly.
For more inspiration on what you can create, check out our article on exploring the exciting possibilities of leveraging RichlyAI for personal purposes. By following these steps, you’ll be creating stunning visuals that get your message across in no time.
Real-World Examples of a Photo Text Editor in Action
It’s one thing to know what a photo text editor can do, but it’s another thing entirely to see how it comes to life in the real world. Let’s look at some practical, everyday examples of how people use these tools to achieve their goals.
Practical Example 1: The Small Business Flash Sale
A local clothing boutique wants to announce a weekend sale on Instagram.
- The Goal: Drive foot traffic and online orders.
- The Image: A high-quality photo of their most popular new dress.
- The Text Editor in Action: They add a bold, eye-catching text overlay that says “FLASH SALE! 40% OFF EVERYTHING“. They use their brand’s signature font and color (a bright pink) to maintain brand consistency. Below that, in a smaller, simpler font, they add “This Weekend Only. Shop in-store & online.“
- The Result: A simple product shot is transformed into an urgent, compelling advertisement that clearly communicates the offer and timeframe.
Practical Example 2: The Fitness Influencer’s Motivational Post
A fitness coach wants to inspire their followers and increase engagement.
- The Goal: Motivate the audience and encourage shares.
- The Image: An action shot of them finishing a run, with a scenic background.
- The Text Editor in Action: They layer a powerful quote over the sky portion of the photo: “The only bad workout is the one that didn’t happen.” They choose a strong, athletic-style font and make the text white to contrast with the blue sky. They also add their Instagram handle as a small watermark in the corner.
- The Result: A highly shareable piece of content that reinforces their brand as a source of motivation and drives brand awareness as it gets shared.
At its core, a photo text editor is the bridge between a great idea and a finished piece of marketing. It’s what adds that final, crucial layer of context that gets people to react.
Practical Example 3: The Event Organizer’s Digital Flyer
Someone is organizing a local community market and needs to spread the word.
- The Goal: Inform the community about the event details.
- The Image: A vibrant, colourful photo from last year’s market.
- The Text Editor in Action: They use the editor to create a simple digital flyer. They add a headline: “Community Market is Back!” Then, using text boxes with clear headings, they list the essential details: Date: Saturday, Nov 18th | Time: 10 AM – 4 PM | Location: City Park.
- The Result: A professional-looking and informative graphic that can be easily shared on community Facebook groups, WhatsApp, and other social platforms.
These are just a few examples, of course. From designing quick event flyers to making standout thumbnails for YouTube videos, a photo text editor is essential for anyone who wants to communicate clearly and visually. It’s also a vital tool when it comes to developing an effective ecommerce content strategy, helping businesses make their product images more informative and persuasive.
How AI Is Revolutionising Photo Text Editing
The future of editing images isn’t some far-off concept; it’s happening right now, and Artificial Intelligence is at the heart of it. Think of AI in a photo text editor less like a complex tool and more like a personal design assistant—one that anticipates what you need, often before you even realise it. It simply takes the guesswork out of the creative process, making professional-looking design something anyone can achieve.
Practical Example: You upload a photo of a serene beach at sunset. Instead of you manually searching through hundreds of fonts, an AI-powered editor might analyze the image and instantly suggest 3-5 fonts that fit the calm, elegant mood, such as a graceful script or a clean, thin sans-serif. This kind of smart suggestion saves a ton of time and guides you toward better design choices from the get-go.
Your Intelligent Design Partner
One of the trickiest parts of design has always been composition. Where exactly should you place the text so it doesn’t block the best part of the picture? AI-powered editors tackle this with automatic text placement.
Actionable Insight: Look for a feature often called “Smart Placement” or “Auto-Position.” When you use it, the AI analyzes your image to find the area with the least detail (like an empty patch of sky or a plain wall) and suggests placing your text there. This ensures your words are easy to read and the overall composition feels balanced, all with a single click.
AI acts as a creative co-pilot, handling the tedious technical aspects of design so you can focus on the bigger picture—your story and your message.
AI also makes complex styling incredibly simple through one-click effects. Features like intricate gradients, drop shadows, and text outlines can be applied instantly. What used to take several steps and a solid grasp of design software is now available to everyone, regardless of their skill level.
A Growing Trend in Nigeria
The influence of AI on creative tools is a worldwide phenomenon, and Nigeria is right in the thick of it. AI-driven features are quickly becoming a staple in the local content creation scene, helping to cement Nigeria’s key role in the global creator economy. As Africa’s largest startup hub, attracting investments of over $500 million in 2024, the Nigerian tech community is embracing AI for everything from automatic text placement to font recognition, speeding up the entire content workflow. You can learn more about the growth of AI in photo editing markets.
This sort of progress is just a glimpse into the broader effects of artificial intelligence. For a closer look, have a read of our guide on the transformative power of artificial intelligence in modern innovation. If you want to dive even deeper, these reviews of the best AI photo editing software are a great place to start.
Frequently Asked Questions
When you start using a photo text editor, a few questions always seem to pop up, especially when you’re trying to get that perfect, polished look. Let’s walk through some of the most common ones and get you the clear, actionable answers you need.
What Is the Best Font to Use on a Photo?
There’s no single “best” font—it’s about matching the font to the photo’s mood and ensuring readability.
- For a modern, clean look: Use a sans-serif font like Montserrat, Lato, or Poppins. These are great for social media graphics and announcements.
- For an elegant or traditional feel: A serif font like Playfair Display or Lora works beautifully for quotes, invitations, or branding for luxury products.
- For a playful, casual vibe: A script font can be fun, but use it sparingly (e.g., for one or two key words) as they can be hard to read in long sentences.
Actionable Tip: Stick to two fonts at most: one for the headline and one for the body text. A great, safe pairing is a bold sans-serif for the headline and a simple serif for everything else.
A common challenge for any designer is making text stand out against a detailed image. The right techniques can lift your words right off the background, transforming a readability problem into a design feature.
How Do I Make Text Readable on a Busy Background?
This is a classic problem with simple, practical solutions. Here’s a step-by-step approach:
- Increase Contrast: Place light text on dark areas of the photo, and dark text on light areas.
- Add an Overlay: Place a semi-transparent colored shape (a rectangle works well) behind your text. A black overlay set to 30-50% opacity can darken the background just enough for white text to pop.
- Use a Shadow or Outline: In your editor’s text effects, add a subtle drop shadow (black, with low distance and some blur) or a thin outline/stroke (usually in white or black) to create separation.
Can I Use a Photo Text Editor for Business Branding?
Absolutely. A photo text editor is an essential tool for maintaining brand consistency. Here’s a quick checklist for using it effectively for your business:
- Upload Custom Fonts: If your editor allows, upload your official brand font files.
- Save Brand Colors: Use the hex code for your brand colors (e.g., #1DA1F2 for Twitter blue) and save them in the color palette for quick access.
- Create Templates: Design a few standard layouts for different types of posts (e.g., promotions, testimonials, tips). This saves time and ensures every graphic looks professional and on-brand.
Are Online Photo Text Editors Safe for Private Pictures?
For the most part, yes. Reputable online editors use secure connections (look for “https://” in the URL) and have clear privacy policies. Generally, your images are processed on their servers but are not stored long-term or shared.
Actionable Insight: Before uploading a sensitive or personal photo, take 60 seconds to check the site’s Privacy Policy. Look for terms like “user-generated content” to understand how they handle your data. For everyday marketing graphics and social media posts, well-known online editors are both safe and incredibly convenient.
Ready to create eye-catching visuals with beautifully styled text? RichlyAI gives you an intuitive and powerful photo text editor that puts professional-grade design in your hands. Start bringing your ideas to life today at https://richlyai.com.