
Believe it or not, learning how to draw a snail is far easier than it looks. At its heart, a snail is really just two simple parts: a spiral and a curved line. If you start by sketching a basic spiral for the shell and then attach the soft, long body, you’ve already won half the battle. This simple approach takes the mystery out of the drawing and gives you a nice confidence boost right from the start.
Table of Contents
- Your First Snail Drawing: A Step-by-Step Guide
- Getting Your Sketching Kit Ready
- Sketching the Snail’s Body and Shell
- Making Your Snail Look Real with the Right Details
- Drawing Inspiration from Real Snail Species
- Common Snail Drawing Mistakes and How to Fix Them
- Frequently Asked Questions About Drawing Snails
- Further Reading: WAEC Past Questions and Answers: Your Ultimate Study Guide, The Role of Artificial Intelligence in Enhancing Content Delivery in Business Education: A 21st-Century Approach
Your First Snail Drawing: A Step-by-Step Guide
Ready to draw your first snail in under five minutes? This practical, step-by-step guide is designed to give you a quick win and build your confidence. The secret is breaking the snail down into simple, manageable shapes.
Step 1: Draw the Spiral Shell
Start in the middle of your page. Lightly sketch a small dot, then begin drawing a line that spirals outward from it. Let the line get wider as it moves away from the center. Don’t worry about perfection; just focus on creating a flowing, organic spiral.
- Practical Example: Try it a few times. Make one spiral tight and another one loose. See how this simple change affects the entire look of the shell.
Step 2: Sketch the Body
Once you have a spiral you like, draw a long, gentle curve underneath it. Think of an elongated “S” shape or a teardrop lying on its side. This will form the snail’s body, or ‘foot’.
- Actionable Insight: Make the front part of the curve slightly thicker to hint at the head. This small detail instantly makes the drawing more recognizable.
Step 3: Connect the Shell and Body
Ensure the bottom of your spiral shell slightly overlaps the top of the body curve. This makes it look like the shell is resting on the body, not just floating above it.
Step 4: Add the Eyestalks
Draw two thin lines extending from the head area. For a more natural look, make one slightly longer than the other and add a small dot at the end of each for the eyes.
Just like that, you have a complete snail! This simple process proves that complex subjects are just a combination of basic shapes.
The real goal here is to build confidence by starting with the most basic shapes. When you see that first simple sketch come together, it gives you the momentum to keep going and add all the fun, intricate details later. It’s all about seeing progress right away.
Getting Your Sketching Kit Ready
Before we dive into more details, let’s talk about tools. Honestly, getting this part right from the start saves a ton of headaches later. You don’t need a fancy, expensive setup, but the right gear lets you focus on creating, not fighting with your supplies.
Your pencil is obviously the star of the show. Instead of just grabbing whatever’s lying around, it helps to have a couple of options. I always start my initial outlines with a standard HB pencil; it’s light enough that mistakes are easy to clean up.
Then, when it’s time to build up shadows and add some real depth, I’ll switch to a softer 2B or 4B pencil. These give you those lovely, dark marks that really make your snail feel three-dimensional. If you’re new to this, spending a few minutes learning how to choose the best sketch pencils for drawing and shading is time well spent.
Don’t Forget Paper and an Eraser
Your pencil needs a good partner, and that’s where the right paper and eraser come in. They’re just as crucial for a clean, professional-looking sketch.
- Paper: Go for something with a smooth surface. A decent sketchbook or a sheet of Bristol board works beautifully. This helps you get those crisp, clean lines without the pencil tip catching on the paper’s texture.
- Eraser: A kneaded eraser is an artist’s best friend. Seriously, it’s a game-changer. Standard erasers often smudge graphite around, but a kneaded one just lifts it right off the page.
Actionable Insight: You can use a kneaded eraser to add highlights, not just remove mistakes. Gently press it onto the snail’s shell to lift off some graphite. This creates a natural-looking shine without any messy smearing. Try this practical technique on your spiral to see the immediate effect.
Nailing these basics gives you a solid foundation to build on. While it’s true that tools don’t make the artist, the right ones give you the control you need to bring your vision to life. And for those of you who might want to explore drawing on a screen, digital tools from platforms like the one at https://richlyai.com/ can open up a whole new world of creative possibilities.
Sketching the Snail’s Body and Shell
Alright, with your pencil in hand, let’s refine our snail. We’ll start by building it from the ground up, beginning with the body—what’s often called the snail’s ‘foot’. Try not to think of it as just a blob. Instead, imagine it as a soft, muscular form that has real weight and a sense of purpose.
The easiest way I’ve found to give the body a natural, flowing look is to start with a simple ‘S’ curve. This single line immediately gives a sense of movement, as if the snail is crawling or has just paused. It’s a great little trick to avoid a stiff, lifeless drawing. Keep these first lines really light and loose; think of them as your rough blueprints.
Crafting the Iconic Spiral Shell
Now for the fun part—that classic spiral shell. The secret to getting a great spiral is to start small and work your way out. Begin with a tiny dot right where you want the centre of the shell to be.
From that central point, start drawing a curve that gets wider and wider as it spirals outwards. It’s this gradual expansion that makes the shell look convincing and three-dimensional. Don’t stress about getting it perfect on your first attempt. Just practise the motion a few times until you get a feel for that rhythm.
This quick visual guide shows how these two basic shapes come together.
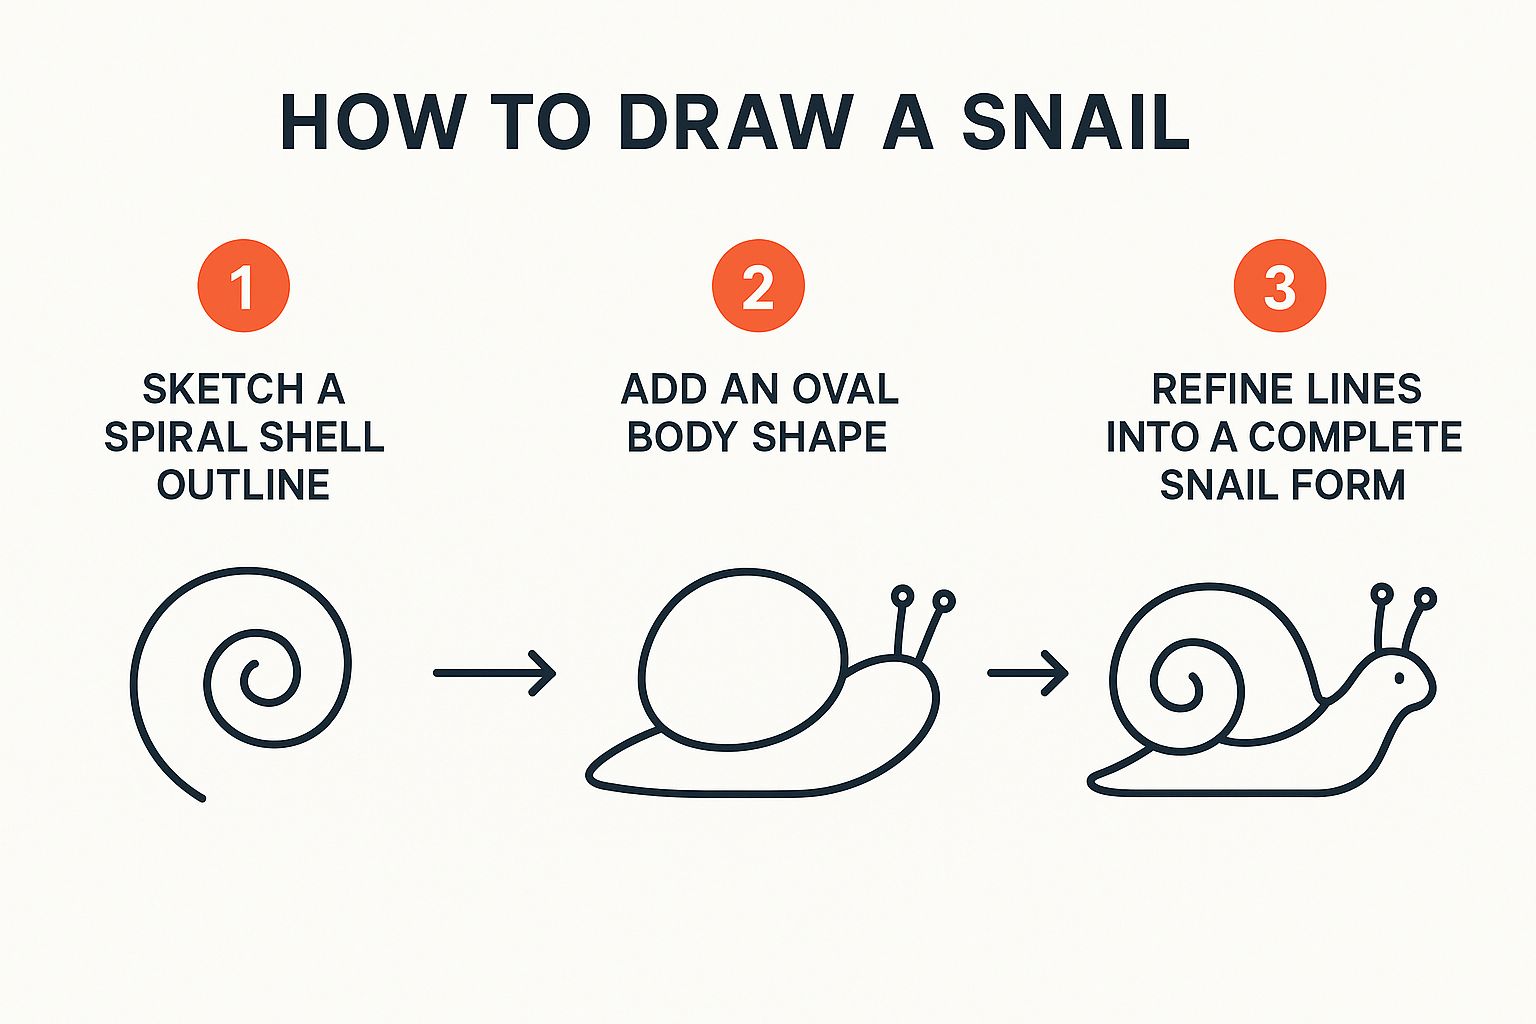
As you can see, mastering how to draw a snail is all about getting these fundamental shapes right before you even think about adding details.
A mistake I see a lot of beginners make is drawing the shell as if it’s just balancing on top of the body. To make it look like it’s actually attached, make sure the bottom edge of the shell slightly overlaps the top of the ‘S’ curve you drew for the body. It’s a tiny adjustment, but it makes a world of difference.
Remember to keep all these initial sketch lines very faint. Think of them as a whisper on the page. This gives you the freedom to adjust proportions and shapes without committing too early, making the final refining process much cleaner.
Once you’ve had some practice with these foundational sketches, you might feel inspired to take your designs to the next level. Building complex images from basic shapes is a core skill in all sorts of design, from drawing a simple snail to exploring how you can use AI for professional designs for things like a logo or website.
Making Your Snail Look Real with the Right Details
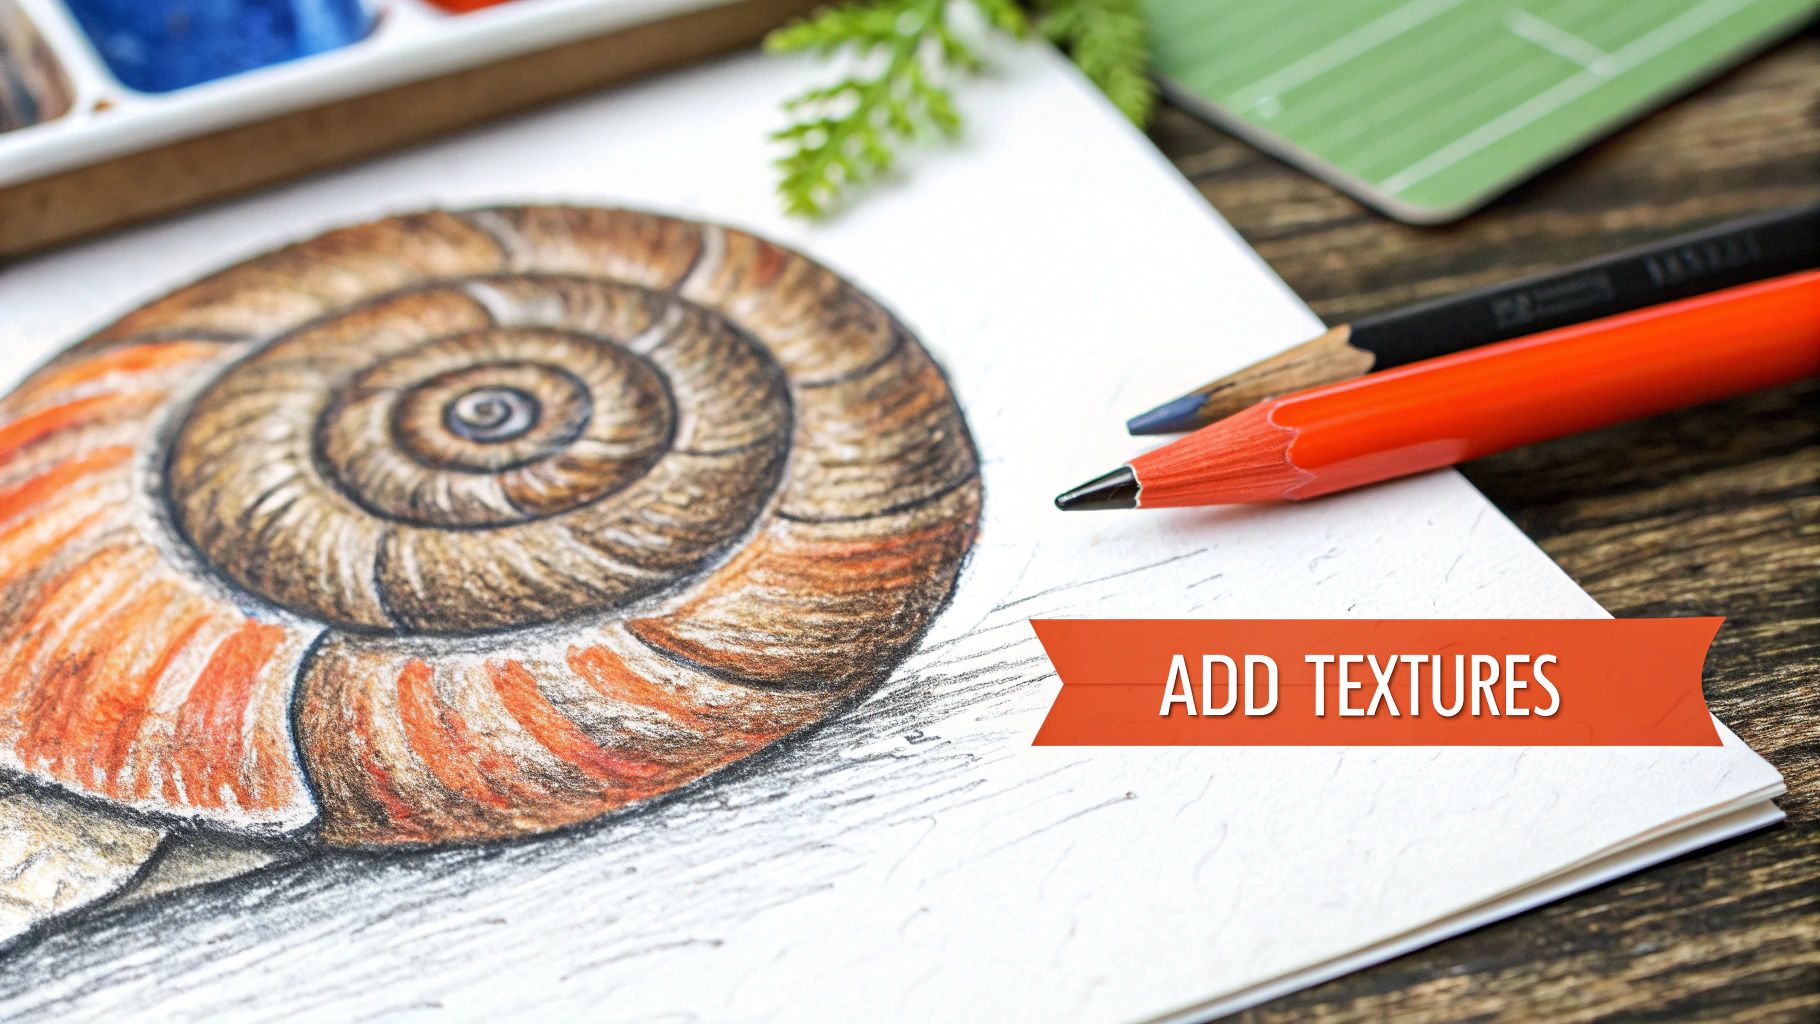
Alright, you’ve got the basic shapes down. Now for the fun part – this is where we turn a simple sketch into something that feels alive. Don’t think of this as making the drawing complicated; it’s about adding personality and making it look believable. Here’s a step-by-step approach to adding those crucial details.
Step 1: Refine the Eyestalks and Head
Instead of just two straight lines, give them some character. Try making one slightly longer than the other, or maybe give one a gentle curve. A subtle tilt can instantly give your snail a look of curiosity or caution.
Step 2: Add Texture to the Body
To get that soft, squishy look, use a series of short, curved lines along the foot. The trick is to avoid making them perfectly even. Let them follow the natural movement of the body, bunching them up a bit where the skin would naturally wrinkle as it moves.
- Practical Example: Draw a few light, wavy lines along the bottom edge of the foot to suggest a slimy trail, adding to the sense of movement.
Step 3: Define the Shell with Whorls and Shading
A snail’s shell is its most iconic feature. Draw the growth lines, known as whorls, that spiral out from the centre. Make sure these lines follow the curve of your initial spiral sketch. They should start off tight and get wider as they move towards the shell’s opening. To make it pop, a little bit of shading goes a long way.
- Cross-Hatching: This is a classic and effective technique. In the areas you want to be shaded (like under the shell), draw light, parallel lines. Then, draw another set of lines over them at a different angle to create depth.
- Where to Place Shadows: The most important spot is the underside of the shell, right where it meets the body. This creates a cast shadow that makes the shell look like it’s truly resting on top of the snail.
Actionable Insight: Shading isn’t just for looks; it’s a powerful tool that tricks the brain into seeing a flat drawing as a three-dimensional object. Just a bit of shadow under the shell and along the bottom of the body will make your snail feel solid enough to crawl right off the page.
Essential Snail Features for Realistic Drawing
Here’s a quick breakdown of the most important anatomical parts of a snail and how to approach drawing them for a more realistic result.
| Snail Feature | Key Drawing Tip | Effect on Realism |
|---|---|---|
| Eyestalks | Vary their length and angle slightly. | Creates expression and personality. |
| Mantle | Add a subtle, thicker line where the shell meets the body. | Grounds the shell and makes it look attached. |
| Foot | Use short, curved lines to suggest texture and movement. | Gives the body a soft, pliable appearance. |
| Whorls (Shell) | Draw spiralling lines that widen as they move outward. | Adds a sense of age, growth, and 3D form. |
| Aperture (Opening) | Shade the inside of the shell opening to make it look deep. | Enhances the illusion of depth and volume. |
Paying attention to these small details is like learning the fundamental rules of a new skill—it unlocks your ability to be more creative and convincing. If you’re interested in how complex topics can be broken down into simple, understandable parts, have a look at our simple explanation of AI for Nigerians.
By focusing on these specific features, you’re not just drawing a snail anymore—you’re telling its story.
Drawing Inspiration from Real Snail Species
To take your snail drawing from good to great, it helps to step away from the generic cartoon look. The best way to do this is by looking at real snails. Honestly, the natural world is your best art director, offering an incredible variety of species, each with unique features that can spark some amazing ideas.
- Practical Example 1: The Garden Snail: A fantastic starting point with its classic, globe-like shell. Its patterns are often mottled browns and yellows.
- Practical Example 2: The Roman Snail: Sports a much larger, paler, and more robust shell. This is great for practicing bold, simple forms.
- Practical Example 3: The Giant African Land Snail: Common in Nigeria, it has a distinctive, elongated, conical shell. Drawing this will help you practice different proportions.
Finding Authentic References
Thankfully, finding good reference photos is simple. A quick online search for different snail species will pull up a treasure trove of images. Look closely at the variations in shell patterns, body colours, and textures—these are the details that will make your drawing pop.
Actionable Insight: The goal isn’t to create a perfect scientific illustration (unless that’s your thing!). It’s about borrowing elements from nature to make your art more believable. Notice how the spirals on a shell can be tight or wide, or how the body texture might be smooth or bumpy. Select one feature from a real snail—like the striped pattern on its shell—and add it to your drawing.
This kind of detailed observation is exactly what scientists do. A survey in Nigeria’s Niger River Valley, for example, tracked freshwater snail populations by identifying key visual differences. You can read the full research about these snail findings to see just how important a keen eye is.
If you’re looking for different stylistic takes, tools like AI cartoon image generators can be a fun way to get some fresh ideas. And if you’re new to that, our guide on how to start using AI without any experience can help you get started.
Common Snail Drawing Mistakes and How to Fix Them
We all make mistakes when learning to draw something new, and snails are no exception. The good news is that spotting these common slip-ups in your own work is the fastest way to get better. Here are some actionable fixes for the most frequent issues.
Mistake 1: The “Sticker” Shell
This is when the shell looks flat and lifeless, as if it’s just stuck on top.
- The Fix: The secret weapon here is shading. Add a simple shadow where the shell meets the body. This one little trick instantly creates a sense of depth and makes the shell feel like it has real weight.
- Practical Example: Take your 2B pencil and add a dark, curved line on the snail’s body directly beneath the shell’s opening. Smudge it slightly with your finger to soften the shadow.
Mistake 2: Unbalanced Proportions
This happens when you end up with a tiny shell on a huge body, or the other way around.
- The Fix: A good rule of thumb is to make sure the shell looks like it could comfortably house the snail’s entire body if it were to retract. Lightly sketch the full volume of the body first, then draw a shell that is proportionally large enough to cover it.
Mistake 3: Rigid Eyestalks and Body
Drawings can look stiff if the eyestalks are perfectly straight or the body curve is unnatural.
- The Fix: Give the eyestalks a slight curve or angle them differently to inject personality. For the body, use a smooth, flowing ‘S’ shape. If your drawing looks awkward, erase and soften those lines to suggest its soft, muscular movement.
Even in scientific illustrations, where accuracy is everything, getting proportions right matters. Some studies show that larger snails can make up around 23% of a snail population, a key detail artists need to get right for realism. You can learn more from these fascinating snail communities in ecological studies. Getting these small details right is a journey, not unlike understanding the subtleties of new technologies, which we explore in our article on Nigeria’s National AI Strategy.
Got Questions About Drawing Snails?
Let’s tackle a few common questions that pop up when you’re just getting started with snail sketches. These are little hurdles many artists face, but they’re easy to clear with a bit of guidance.
How Can I Make the Snail’s Shell Look Genuinely Shiny?
That glossy look all comes down to mastering highlights. Once you’ve shaded your shell, take your eraser and gently lift away some of the graphite from the most rounded part—where light would naturally bounce off it.
To really make that highlight pop, deepen the shading right around the edges of the erased spot. This contrast between the bright highlight and the surrounding darker tones is what sells the illusion of a shiny, wet surface.
What’s the Trickiest Part for a Beginner?
For most newcomers, the spiral of the shell is the biggest challenge. Getting it to look three-dimensional and not like a flat cinnamon bun can be frustrating. The secret is to start light. Very light.
Focus on sketching a loose, continuous line that gradually widens as it spirals outwards. Keep your pencil strokes faint until you’re happy with the overall form. Only then should you commit to darker, more confident lines. It’s all about practice, not pressure.
Can I really draw a snail without any fancy art supplies? You absolutely can. All you truly need is a basic pencil and a scrap of paper. The core skills are in seeing the shapes and training your hand to draw them, and you can practise that with the simplest tools available.
Ready to take your creativity beyond the sketchpad? With RichlyAI, you can generate stunning visuals, compelling text, and even code in moments. It’s a great way to speed up your creative workflow and bring your ideas to life. See what’s possible at the RichlyAI website today.
